Hi everyone!!! I hope you have all been well?
Today I would like to share with you this layout I made using a combination of the new collections by Aida and Olga at 13 Arts.
You will notice in the tutorial below that these finished photo's actually have a different photo on them to those throughout the tutorial. Unfortunately as I was adding final touches i spilled quite a bit of ink over the photo and it was ruined, so I have cut another photo to the same size and replaced it..... The bonus is I like this photo on here much better!!!
'Beautiful'
Some Details:
Here is the tutorial :-)
Start
by choosing your sheet for the background, then from another sheet of
paper tear a strip using a ruler roughly 4 inches thick and glue it onto
your background sheet to the left of the page, but not on the edge
(leave a small gap). Then tear off the bottom left hand corner. Cut a
rectangle of yet another piece of paper to fit behind it. Then attach
everything to a thick piece of cardstock.
Use a paint brush or palette knife to paint
1-2 coats of Clear gesso over the entire background. When it is dry add
some Modelling paste through the Doily mask for texture. Let it dry
thoroughly before continuing with the next step otherwise the water and mist can cause the modelling paste to loose it stenciled shape and wash off.
Start
with both the Pastel and Chalk Dirty Pink Mists. Unscrew the lids or
spray some onto your desk, then use a small paintbrush to flick the
colors all over the background. Then flick water over the top and let
the mist mix with the water on the page. Add more color and water as
necessary.
Dry it with a heat gun.
If
you want your background to be darker or more vibrant, add another
layer of color when the first is dry once again using the Pastel and
Chalk Dirty Pink Mists, but also add some Pearl Pink, Chalk Woodbine and
Fuchsia, and Pastel Raspberry Mists in small amounts, along with water,
slowly building up your color until you are happy with it.
You can dry it with a heat gun to gen some interesting watercolor effects,
When
the Mists were completely dried I used my palette knife to scrape some
very small amounts of gesso over certain areas to highlight some of the
stenciling and lighten the color in certain spots.
When
the Gesso was dry I added some random stamping with the new Chart Stamp
and also stamped Beautiful Memories near the top of the page. I then
added splatters of Black Water-based Ink and the new SPLASH! Ink in
Glitter Pink.
Next
I have used papers mostly from the Secret letter Collection along with a
small piece from the Winter Tales Collection to build my photo mat. I
have distressed the edges of each piece of paper and used foam tape
between layers for dimension. I then added some Calico, Twine, and my
photo.
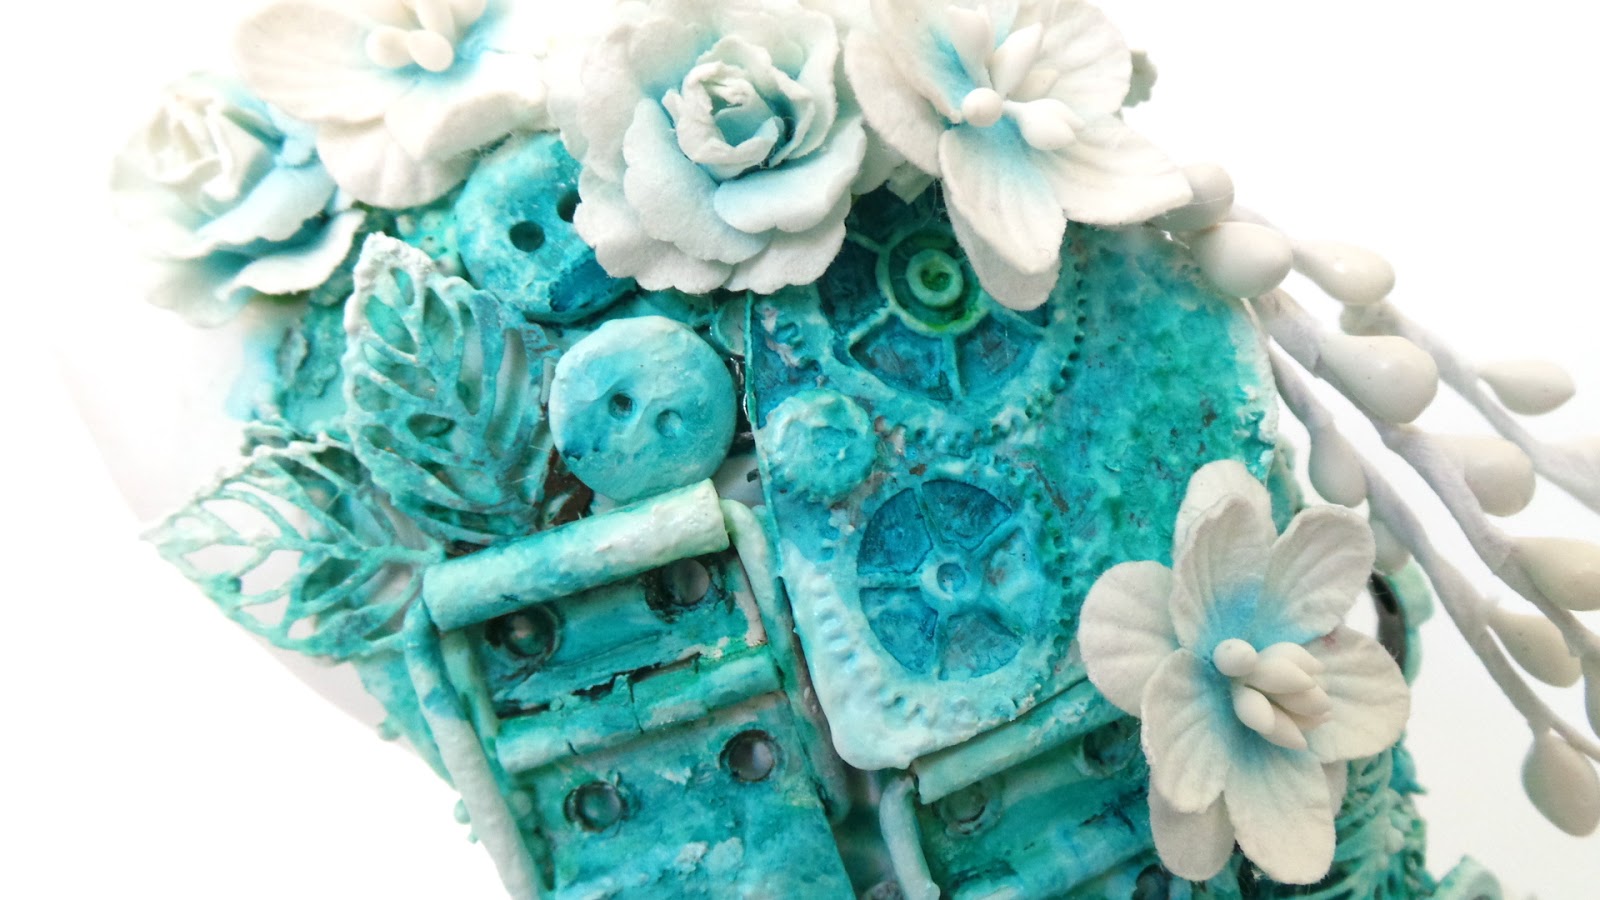
Next
I began embellishing. I have added some different flowers, metals, ect.
Then I have taken the chipboard word Beautiful from the Secret Letters
Word Chipboard Sheet and covered it entirely in Gel medium then
sprinkled Fine Silver Mica Powder over the top. I have attached it above
the clock and flowers to the bottom right of my photo.
I
have cut pieces of the Openwork Table Cloth and added them into my
cluster along with the Pink pearl Twigs. I then added some Gel Medium in
some areas beneath the clusters and sprinkled Purple Mica Flakes to it,
before adding various different crystals from the 13 Arts store.
I have continued to build up my embellishments around the page, adding more Twigs and Pearl Twigs along with a couple of 13 Arts flowers.
I
have cut 2 butterflies from a sheet of paper in the Secret letter
Collection, adding one each to either side of the page, wings folded
slightly up. I have added a Dusty Attic chipboard piece beneath the
flower cluster on the left with I have painted with the Glitter Pink
SPLASH! Ink.
I continued to add pieces of the Openwork Table Cloth, Crystals and Gems and Purple mica Flakes beneath my clusters.
I have also brushed the tips of all my flowers with Gesso.
To
finish my page and tie everything together I added splashes of Chalk
and Pastel Dirty Pink Mist and Pearl Pink Mist to my flowers, and also
my chipboard title and other embellishments. I then brushed the Glitter
Pink SPLASH! Ink along the tips of the flower petals.
I added a small Gold Key and a 13 Arts Decorative Heart Crystal for final touches.
As
you can see it was at this last stage that disaster struck and I ruined
my photo. to replace it i simply gently peeled back any embellishments
that were glued directly to the photo, and pushed them to one side (I
did not need to remove them completely) then slid the new photo in
place, gluing straight onto the old one. I then carefully glued my
embellishments back down.
As I said at the start I like this photo much better!!!!
That is all from me today!!
I hope you like my layout and that you found my tutorial helpful.
Wishing you all a wonderful weekend!!!!
13 Arts products used: