Thursday, 19 December 2019

"Timeless" mini canvas

Hi to everyone!
Today I like to show you my mini canvas with a style I like so much, vintage style and rusty effect!
After many Christmas project, I nedeed a different project! I wanted to play with some texture and colors to create a rusty effect, without pastes! 

this is my canvas


For this piece I used


Thank you for stopping by!

Sab


Wednesday, 18 December 2019

Baby girl

I hope you liked our December challenge and are working on your creations with much joy. 
Let's see how I put my layout together, step-by-step.


I traced the pine tree shape on a piece of paper, then I decorated it with stencil and grey ink pad.
By using modeling paste I stenciled snow-whiffs on the whole page. First I was working with another picture....


I splattered watercolor from my palette on a foil, then I pressed this foil on the page.


I spread some splash ink everywhere to give my creation a snowy - glittery shine.


I applied some stickers and a few snowflakes and stars using heat embossing.


I used sisal to lift the photo. Now it's time to arrange some flowers, berries, pine tree and chipboard...


A bit of stamping and splattering black splash ink over the page. Here, I was using a different photo.


It wouldn't be complete without spheres and micro beads.


Now let's have a look at the finished layout:


Products what i used:
Paper Flowery Day


We'd like to encourage you to show us your projects!
You can share them in our ARTelier FB Group
You can also tag us on Instagram (@13arts).


Thank you for watching :)


Monday, 16 December 2019

TUTORIAL "Beautiful" by Kareen

Hello everyone!

Okay... I wanted to do a Christmas layout at first (you will see that my first photo was a Christmas photo in the video!!!). But.... I don't know.. I didn't feel like Christmas when I begun to create...
ahah It happens right? And I felt like Gold/Black/White Combo was the good one!

I have a video process of course for you! 


And this is my layout : 


Some close-ups : 


Material used : 


Thank you for watching !!!
See you soon!


Saturday, 14 December 2019

Same colors diffenet looks


Witam serdecznie!

Mam dzis do pokazania kolejna prace z farbami 13arts, przyznaje ze mieszanie kolorow sprawia mi wiele frajdy  !

Hi!
I have new canvas for today, I will be first to admit mixing paints by 13arts brings me lots of joy!


Bez silikonu i z gesta farba  uzyskuje sie duzo mniejsza rozlewnosc  farby i niewiele "komorek".

No  silicon and  much ticker paint results in  less flow of paint and less "cells".


Druga praca z  bardzo podobnymi kolorami ale zupelnie odmienna technika.

Second project made with similar colors but using different technik. 


Wednesday, 11 December 2019

My Boy layout with Sandi Clarkson

Hello, 13 Arts friends!
Sandi here with you today sharing my latest creation for 13 Arts.

One of my dear family members recently send me a professional photo of her dog, Jack with no explanation. In my family that is code for: would you please make a layout for me? And since the holidays are near, I put forth my best effort to get something created in time for gift-giving.


I chose a few of the Grungy Walls papers: Tattered WoodRusted and Scratchy Walls and used my favorite paper tearing technique to create a background.

Many of my embellishments were created using the gorgeous Grungy Walls, Postcards A4.


I started with my usual coat of Clear Gesso and then did some random stamping with the Stamp Nature A7 to create some dimension. For further texture, I used the HIS TIME stencil and pushed Modeling Paste mixed with Magic! Powder through it.


Behind my photo I added a chipboard piece from my stash that was altered with my 13 Arts Patina Bronze Mist. Toward the end of the composition, I added some blue paint from the Watercolor set 16 pans - set of watercolors. These colors are quite vibrant and you can use them as is or water them down to your preferred intensity.


To heighten the interest around my photo, I've added some chipboard stems from Chipboard set Summer Rhapsody A4 and some Ecru Sisal. These were left unaltered.


Because this dog resides on a horse ranch with his owner, I felt I needed some to add something from my jar of "mechanical pieces." I was looking for a buckle or some such thing but all I had was basic screws, washers and so forth. I love that these add a touch of grunge to my layout. Multi-purpose medium was used to secure them.


My title chipboard is from Chipboard Set Blue Magnolia A6 and was mounted on elements from the Grungy Walls, Postcards A4.

I have finished with some twine and a few old flowers from my stash.
That's it from my today.

Here is a list of my products if you need to go shopping!

13 Arts products used: 
Tattered wood paper. Grungy Wall
Rusted paper, Grungy Walls
Scratchy Walls paper, Grungy Walls
Grungy Walls, Postcards A4
Stamp Nature A7
Stencil masks HIS TIME
Chipboard set Summer Rhapsody A4
Chipboard Set Blue Magnolia A6
Watercolor set 16 pans - set of watercolors
Patina Bronze Mist
Ayeeda Paint METALLIC! Old Silver
Clear Gesso
Modeling Paste
Magic! Powder
Multi-purpose medium
Gel medium
Ecru Sisal
Silicone Brush Oval 50mm
Watercolor flat brush 4 mm
Watercolor Brush Circular 4 mm
3D balls medium


Friday, 6 December 2019

Layout "Wings of Imagination" by Monika

Witajcie, tu Monika z kolejnym LO jeszcze w jesiennych klimatach z moją młodszą siostrą w roli modelki. Do zrobienia tła tym razem wykorzystałam cudowne akwarele 13arts. Bardzo lubię z nimi pracować bo kolory są naprawdę mocno napigmentowane i bardzo szybko możemy wykonać ciekawe tło.

Hello, this is Monika with another layout still in autumn theme with my younger sister as a model. To create the background, this time I used wonderful 13arts watercolors. I really enjoy working with them because the colors are really heavily pigmented and we can make an interesting background very quickly.


Zanim jednak pomalowałam tło akwarelami, na papier zagruntowany białym gesso nałożyłam wzór z pasty strukturalnej przez Stencil Piano. Aby uwypuklić wzór z szablonu wykorzystałam miękki ołówek i roztarłam go palcem. Bardzo lubię ten efekt.

However, before I painted the background with watercolors, I applied a structural paste through Stencil Piano. To emphasize the pattern from the stencil, I used a soft pencil and rubbed it with my finger. I really like this effect.


Wykorzystałam: / I used:


Ściskam! / Hugs!


Wednesday, 4 December 2019

"Cozy Wishes" Christmas Tag By Christine


Hi everyone!
Today I am with you to show you my last creation for 
the year 2019. 
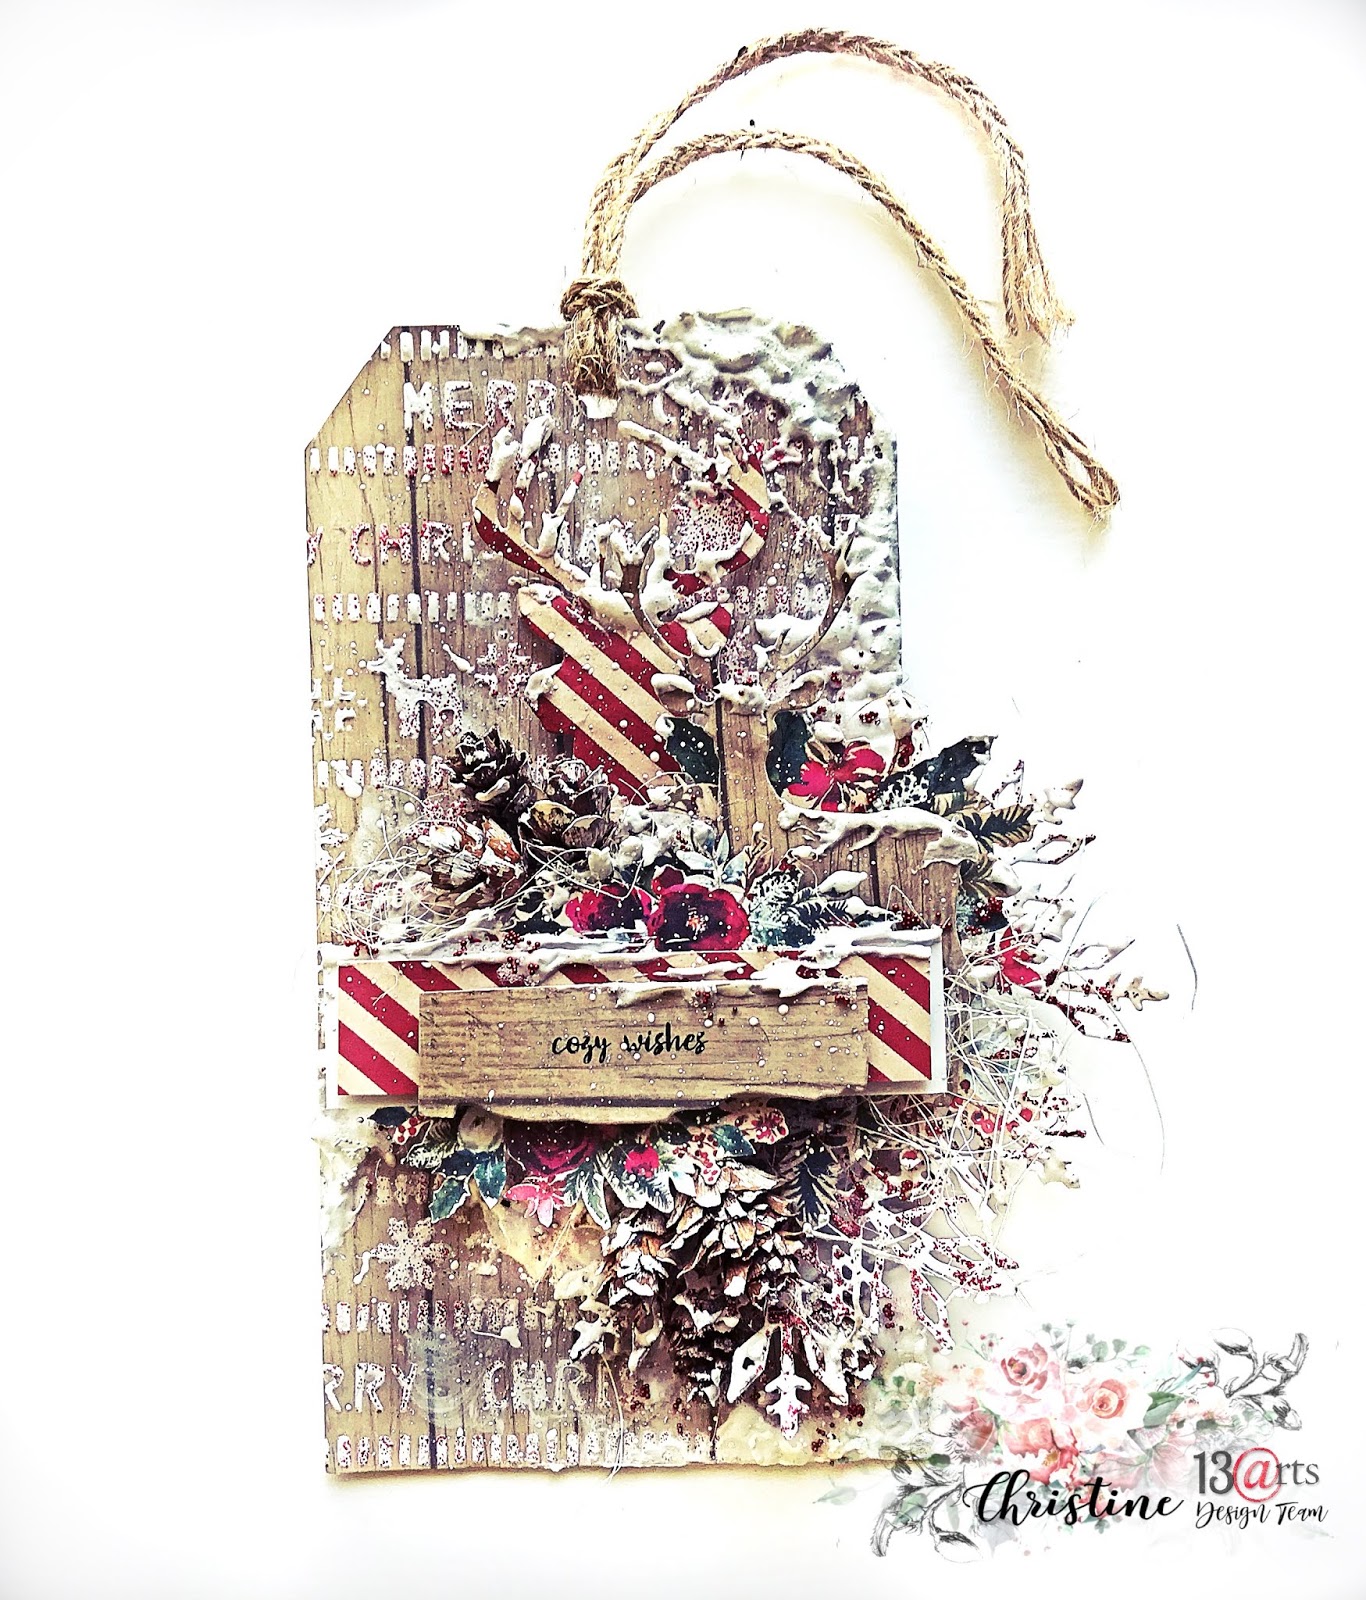
I made a Christmas tag.


I cut a form of tag in a paper from the Christmas Traditions collection, 
then I stick it on a thick cardboard.
With a brush I spread a layer of clear gesso all over the tag.
 I use modeling paste and a stencil to make the pattern on the background paper. 


I cut with deer shapes with dies in two papers from the same 
Christmas Traditions collection.
In the pad of papers there are pictures to cut, I cut some to make my composition.
In white cardboard I cut shapes of snowflakes, I spread a little bit of Splash! Crystal Bordeaux Glitter here and there.
I put fake snow in several places. I added a little sizal, some pine cones, glass microspheres
 red microspheres.
And finally I made drops with Splash! White.


Products used:


I hope you have a little inspiration to make your Christmas tag.
Happy Holidays time!