
Hello, 13 Arts friends and fans!
Sandi Clarkson here with you today sharing my most recent project for 13 Arts featuring the 13 Arts End of Summer collection. Although I am still actually knee-deep in Christmas preparations at the moment, I had an idea in mind for scrapping this sweet photo of my young granddaughter Marianne playing in the leaves. So, I'm mixing in some Fall along with the Christmas season.
Let's look at today's project, shall we?

As usual I prepared my paper with clear gesso before moving on to stenciling with the new Stencil Vintage letter, END OF SUMMER and 13 Arts modeling paste.
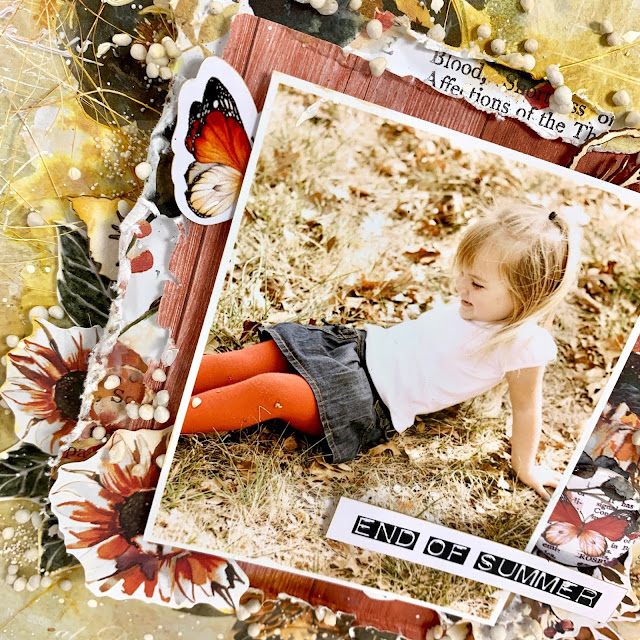
Then it was a matter of adding papers from the End of Summer A6 paper pad for my focal point and to serve as photo matting. I added lots of corrugated cardboard between my layers for dimensional and to enable me to tuck in my embellishments.

I adore the gorgeous rust and cream sunflowers in this End of Summer Ephemera Pack. So, I added with abandon as I wanted a very full look. Also, we now have the wonderful Art Book, vol 1 for fussy cutting even more images.
I also used some of the chipboard from the collection for further embellishing.

When my composition was nearly finished, I added both Brown Water Ink as well as Yellow Amber Water Ink (links below) to make the focal area more dominant. As an additional layer, you can see that I also used some ecru Sisal from 13 Arts.

I finished the layout with some splattering of watered down 13 Arts White Gesso.

The butterflies from the End of Summer Ephemera pack are bright and beautiful. I just had to use a few for whimsy and to brighten things up. Also, the new Badges are so fun to tuck in amongst your layers.
I hope that this will inspire you to create and make use of your 13 Arts products.
Below is a list of products used in case you need to shop:
13 Arts products used:
Thank you for stopping by today!
See you next time,
Sandi


