Showing posts with label Grungy Walls Butterflies Emphemra. Show all posts

Friday, 10 January 2020

Kartka urodzinowa / Birthday card

Cześć,

nowy rok zaczynam z kartką w spokojnej brązowej kolorystyce z odrobiną pomarańczowego. Kartka przeznaczona jest na urodziny, ale napis jest na tyle uniwersalny, że sprawdziłaby się przy każdej okazji.

Hello,

I start the new year with a card in calm brown colors with a little bit of orange. The card is intended for birthdays, but the inscription is universal enough that it would work on every occasion.


Baza powstała w papierów z kolekcji "Grungy Walls" zarówno z dużego arkusza, jak i z arkusików z małego bloczka. Takie połączenia są o tyle fajne, że nawet taki sam motyw w mniejszej wersji wygląda fajnie w połączeniu z dużą wersją.

The base was created in papers from the "Grungy Walls" collection both from a large and  a small papers. Such combinations are cool because even the same theme in the smaller version looks nice in combination with the large version.


Kartkę udekorowałem kwiatami w pasującym kolorze oraz piękną tekturową liściastą rameczką. Nie mogło również zabraknąć kilku motylków. Pochodzą one z zestawu dodatków, ale mój nawyk do wycinania wziął górę i odciąłem z nich białą obwódkę.

I decorated the card with flowers in a matching color and a beautiful chipboard leaf frame. There could also be a few butterflies. They come from a set of ephemera, but my habit of cutting out prevailed and I cut off a white border from them.


Na koniec dodałem duży napis pokryty czarnym splashem oraz kilka czarnych perełek w płynie.

At the end I added a large inscription covered with black splash ink and a few black liquid pearls.


Produkty: / Products:


Pozdrawiam,

Regards,

Dawid


Thursday, 22 August 2019

"Shine" ~ Grungy Walls Layout with Sandi

Hello, everyone! 
Sandi here with you today from the very hot, hot, hot State of Texas in the USA. 
Temperatures are in the triple digits. Yikes! 

With some cooler weather in mind, I'm excited to finally scrap this photo of little Peyton from a Fall Festival a few years back. I also wanted to have a little fun with the new Grungy Walls collections. 


Here is my finished project. 
I began with some fussy cutting of elements from the Scratchy Walls paper. .. lovely flowers along with feathers, arrow and chains. I set those pieces aside and layered more of the Scratchy Walls paper on top of the lovely Washed Wood paper. After applying a layer of Clear Gesso, I used some whitened Modeling Paste and pushed it through the Night Flowers Stencil. When that was dry, I randomly stamped black ink with the Blueprint Stamp


After tearing some of the Rusted Paper from Grungy Walls for part of my photo layers, I used the B side for my actual photo mat. I adhered the photo pieces to some corrugated cardboard and then began adding in my fussy cut elements as well as some various chipboard pieces from the 3 sets listed below. 


For texture, I tucked in some Ecru Sisal and some of my fave Gold Microspheres


A few 13 Arts Flowers were added as embellishments as well as a few older Petaloo from my stash to make that painted face and pizza pop! 


Aside from my Ayeeda Paint - Matte White mixed in with my Modeling Paste, I didn't really use any colored wet mediums on this sweet page. However, I'm very pleased with how it turned out. 

Thanks for coming by the blog today! 
Here is a shopping list if you wish to create a similar page. 

13 Arts products used:


Saturday, 17 August 2019

Forever - grungy layout by Aida

 Today I want to share my new layout with you. It's grungy, textured, but still girly page, even though there are no flowers:) I like textures and colors of our new Grungy walls collection. I used few mediums to add colors: metalic paint, shiny powder and Splash! Ink. Some 3d balls add extra dimension to the page.


I used:
Grungy walls collection: Papers 12x12, ephemera pack,


Tuesday, 13 August 2019

Monday, 12 August 2019

They lived happily ever after

Hello dear 13@rts friends

I hope you have all been well. I am back on the blog today sharing this layout I created using products from our latest release.


Products used:

I started by adding more texture on the background using a combination of gel medium, Black lustre Shiny Powder and Bronze Shiny Powder through a stencil.


Next I added layers of burlap, lace and Ecru roots to create an area to place my photo.

I coloured Dusty Attic Chipboard pieces  using a range of 13@rts Vintage paints, Bronze Metallic paint and Black Lustre Shiny Powder.


I affixed chipboard pieces to the back of my photos to make stronger before affixing them in place.

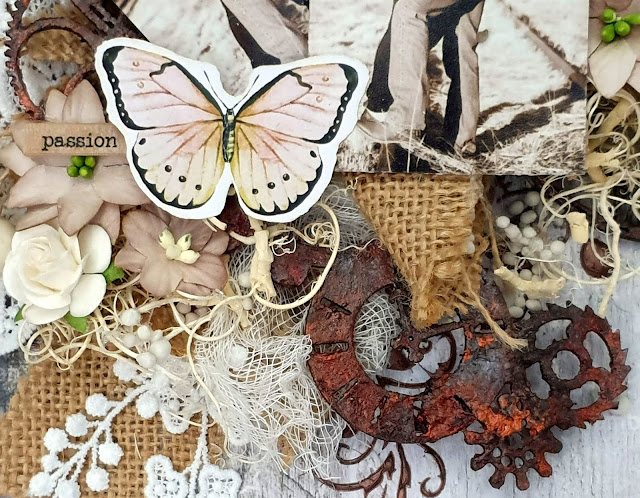
To embellish I added emphemra pieces from the Grungy Walls Butterflies Collection and a couple of sand coloured flowers from 49 And Market.


Last but not least, I finished it off using my favorite 13@rts stickers, 3D Powertex Balls and a couple more of strings of lace.

I hope you enjoyed your time here and hope you visit us again in the near future.

Till next time have fun and take care.