Showing posts with label modeling paste. Show all posts

Tuesday, 8 December 2020

Big tag with seahorse

 Cześć,


dziś przygotowałem dla Was wyjątkowo duży tag. Postanowiłem wykorzystać odlew konika morskiego i nieco kół zębatych.


Hi,

today I've prepared an exceptionally large tag for you. I decided to use a resin seahorse and some gears.


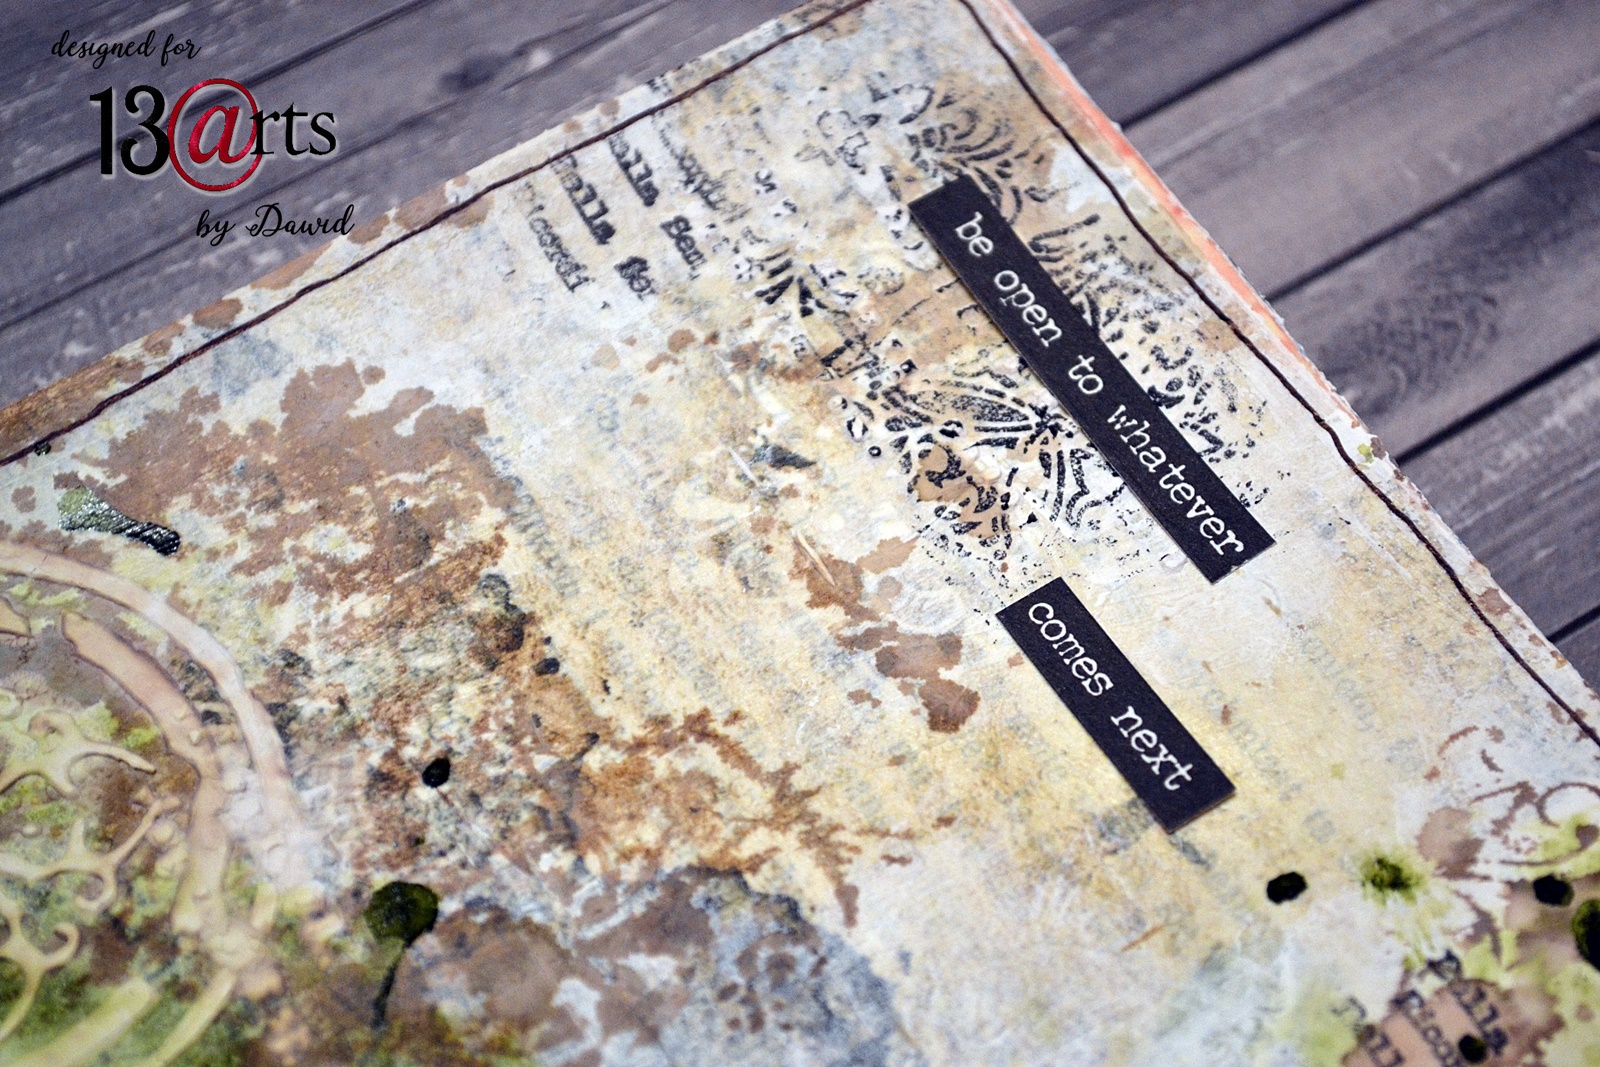
Zacząłem od zrobienia tła używając zębatek i rur z MDF-u, które nakleiłem na tag za pomocą multipurpose medium. Potem pokryłem całość dwoma warstwami białego gesso. Dodałem też nieco faktury używając maski i pasty modelującej.

I started by making the background using MDF gears and tubing which I glued onto the tag with multipurpose medium. Then I covered it with two layers of white gesso. I also added some texture using the stencil and modeling paste.


Następnym krokiem było doklejenie konika morskiego z żywicy, którego też pomalowałem białym gesso.

The next step was gluing a resin seahorse, which I also painted with a white gesso.


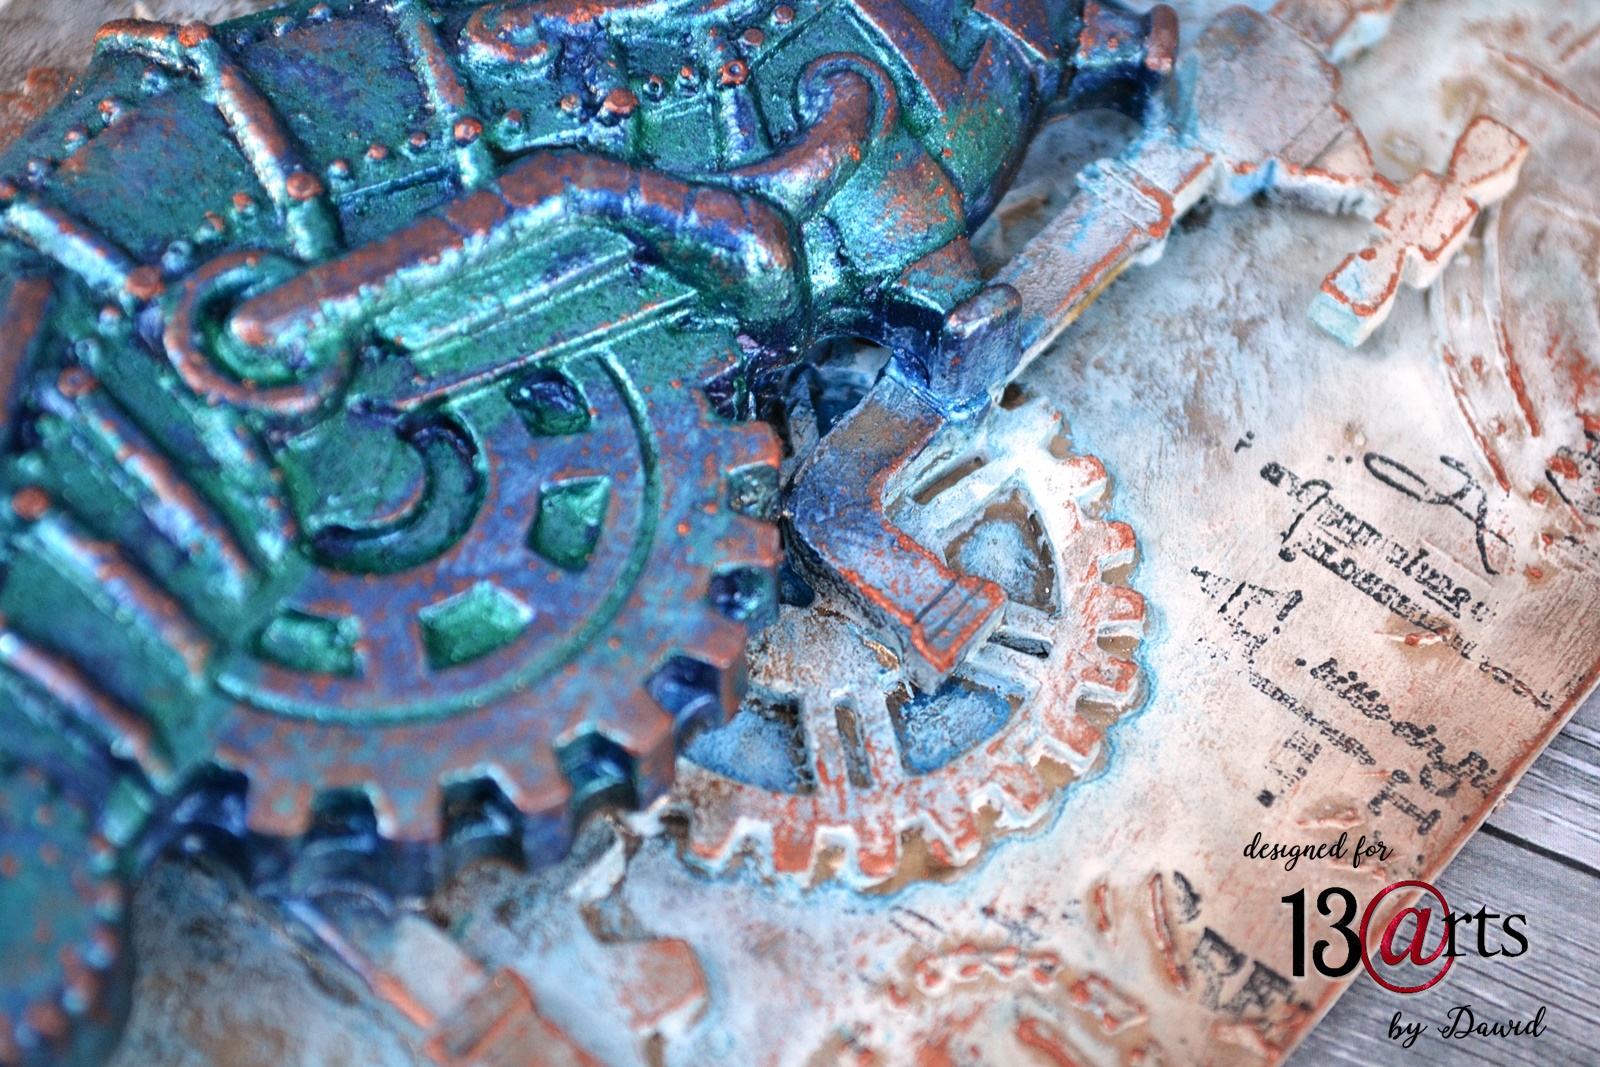
Do pokolorowania pracy użyłem metalicznych farb akwarelowych w proszku Color Glow.
Zacząłem od samego konika. Do pomalowania go użyłem różnych odcieni niebieskiego. Color Glow wymieszałem z płynnym medium akrylowym co pozwoliło uzyskać pięknie błyszczącą farbę akrylową. Na spód dałem ciemny niebieski, a gdy tylko farba wyschła to nałożyłem jasny kolor ścierając go po chwili za pomocą wilgotnej chusteczki. Pozwoliło to na uzyskanie ciekawych przetarć.

I used powdered metallic watercolor paints Color Glow to color the work. I started with the horse itself. I used different shades of blue to paint it. Color Glow was mixed with a liquid acrylic medium, which allowed to obtain a beautifully shiny acrylic paint. I put a dark blue on the bottom, and as soon as the paint was dry, I applied a light color, wiping it off after a while with a damp tissue. This allowed for interesting abrasions.


Kolejnym krokiem było pokolorowanie tła. W tym celu użyłem Color Glow wymieszanego z wodą i odrobiną ciekłego medium akrylowego. Dodanie wody stworzyło nieco rzadszą farbkę, która pozwoła na rozprowadzenie jej za pomocą wody. Gdy tylko farba tła wyschła dodałem kilka odbitek ze stempla.

The next step was to color the background. For this, I used Color Glow mixed with water and a little liquid acrylic medium. The addition of water created a slightly thinner paint that allows it to be spread with water. As soon as the background paint was dry, I added a few prints from the stamp.


Do wykończenia pracy użyłem wosku w kolorze miedzianym. Zrobiłem go mieszając bezbarwny wosk z farbką Color Glow. Nałożyłem go palcem co pozwoliło na uwydatnienie wszystkich detali mojego projektu. Na koniec dodałem tekturki z napisami.

I used a copper-colored wax to finish the project. I made it by mixing clear wax with Color Glow paint. I put it on with my finger which allowed to emphasize all the details of my project. Finally, I added cardboard with inscriptions.


Produkty: / Products:

Multipurpose medium

Liquid acrylic medium

White gesso

Modeling paste

COLOR GLOW Golden Calcite

COLOR GLOW Tanzanite

COLOR GLOW Tourmaline

COLOR GLOW Emerald

COLOR GLOW Tiger Eye

Stamp Blueprint A6

StazOn Ink Black Jet

Round oval paintbrush 20 mm

MDF chipboard pipes


Pozdrawiam,


Regards,


Dawid


Tuesday, 17 November 2020

Find New Ways

 Cześć wszystkim,

próbowaliście już tworzyć z papierami ryżowymi? Ja dziś pokażę Wam moje kolejne podejście do nich, ale tym razem użyłem w art journalu. Wybrałem papier z kolekcji "Bella" z pięknymi zielonymi drzwiami.


Hello everyone,

have you already tried creating with rice papers? Today I will show you my next project with them, but this time I used it in art journal. I chose paper from the "Bella" collection with beautiful green doors.


Zacząłem od pokrycie stron journala białym gesso, a następnie przykleiłem na nie wydarte elementy papieru ryżowego. Do przyklejania użyłem płynnego medium akrylowego. Jest ono po wyschnięciu błyszczące, więc całość pokryłem dwoma warstwami bezbarwnego gesso, które zmatowiło strony journala.


I started by covering the journal pages with a white gesso, and then glued the pieces of rice paper to them. I used a liquid acrylic medium for sticking. It's shiny after drying, so I covered the whole thing with two layers of clear gesso, which matted the pages of the journal.


Następnie nałożyłem białe gesso używając gąbeczki. Naniosłem je tak, by brzegi były jakby naturalnie "wtopione" w tło. Dodatkowo ubrudziłem motywy białym gesso.
Następnym krokiem był kolor - wybrałem tusz wodny w kolorze green olive. Po rozprowadzeniu go zdecydowałem się dodać jeszcze nieco brązu. Naniosłem go używając maski jak stempla. 


Then I applied the white gesso using a sponge. I applied them so that the edges seemed to be naturally "blended" into the background. Additionally, I got the motifs dirty with white gesso. 
The next step was color - I chose a green olive water ink. After spreading it, I decided to add some more brown. I applied it using a stencil like a stamp.


Dodałem też nieco faktury dzięki paście modelującej i maskom. Obie strony uzupełniłem odbijając stemple w kilku miejscach. 
Na koniec dodałem napisy i zrobiłem ramkę.

I also added some texture with the modeling paste and stencils. I completed both pages by stamping stamps in several places.
Finally, I added the subtitles and made a frame.


Produkty: / Products:


Pozdrawiam,

Regards,

Dawid


Tuesday, 10 November 2020

Sweet November


Dear All, 

In my opinion the month of  November is being a bit neglected. 
In September we are busy with the beginning of the new school year, in October there are many festivals and excitement as well. 
On the contrary to this, the 11th month of the year seems to be rather quiet. 
Although this month of Autumn is full of inspiring things. 
The nature looks wonderful at this time of year, the air is fresh and crisp - ideal for an Autumn hike. 
In an album like this we may gather many memories of these experiences - filled with colorful pictures. 


Products what i used:


We'd like to encourage you to show us your projects!
You can share them in our ARTelier FB Group
You can also tag us on Instagram (@13arts).


Thank you for watching :)


Monday, 26 October 2020

Petite Latterns


My dear Creators,

I brought some cozy lantern decorations – using the latest collection - for you today. 

I recently visited a friend of mine, where I saw these gorgeous lanterns and I just couldn’t wait to make them myself as well.

I was cutting with ease with the cutter I was lent and afterwards I could start decorating. 

On these tiny surfaces the elements and cut outs of the Ephemera set show fantastic.

I was stencilling, embossing, painting and cracking still I was trying to keep the balance and not to overuse the decoration.

They ended up being cut little creations although it’s quite a challenge to photograph them.


Products what i used:


We'd like to encourage you to show us your projects!
You can share them in our ARTelier FB Group
You can also tag us on Instagram (@13arts).


Thank you for watching :)


Monday, 14 September 2020

Winter wonderland


 Hello Everyone!


I was mesmerized by the latest Dreamland collection! 

I can see the glittering snowy scenery, the happy faces of the children sledding down the hill.

I can hear the footsteps of forest animal lurking nearby.

This is the atmosphere I' am showing you today on my latest layout.


1. clear gesso + glitters


2. stenil + modeling paste


3.  embossing powder


4. watercolor


5. mist


... amazing background 


6. stamps 


7. photo


8. die cuts, flower elements


9. ephemeras


10. 3D balls


11. Splash! ink


Products what i used:


We'd like to encourage you to show us your projects!
You can share them in our ARTelier FB Group
You can also tag us on Instagram (@13arts).


Thank you for watching :)